Flutter tutorial: Guide to start Flutter project
Flutter is great for developing cross-platform apps. We will be discussing flutter step-by-step in this article.
Flutter
Flutter allows developing cross-platform apps using a single programming language (Dart). It is an open source and got famous after Google announced the release preview of Flutter.
Software Installation
Firstly, install some software on a local machine. You can use macOS, Window or Linux. You can get both ios and android environments on the same machine by using macOS.
Install Flutter
First, Download Flutter SDK and extract it to a suitable location. We can do this by the following command:

To access flutter globally, add flutter to our $PATH by using following command:

Confirm installation by running:

It will print all available commands of Flutter.
Install Dart (Optional)
Some Dart libraries come with flutter, to get extra tools you need to install Dart as well. Install Homebrew in order to get Dart. Download Homebrew by following command:

Install Dart by using following commands:

Install Xcode
Cross platform apps can be developed with Flutter. For iOS app, install Xcode on macOS. It is easy to install Xcode on macOS by using your Apple account and download it from App store.You will get multiple command line tools along with Xcode.To configure these tools so that you can use Xcode, use the following command:

After installation, agree to the terms and conditions of Xcode by opening Xcode and clicking on the Agree button or by running sudo xcodebuild - license. Flutter app can be run on iOS devices using Xcode.
Install Android SDK Studio
To develop an Android app, you need Android Studio. Start Android Studio; to install Android SDK tools you can utilize Android Studio Setup Wizard.
Use Flutter Doctor
By using Flutter Doctor command, you can get giddiness regarding setting up the local development environment for both iOS and Android.

Setting up Editors
You can use any IDE for Flutter development. You can use lightweight editors like Sublime Text etc. The choice is yours.
Know Pub Package Manager
There is pubspec.yaml file in the Flutter project, which imports Dart dependencies. To install dependencies you need to mention it in the file and the command can be used to install it.

It is used to lock dependencies and will create pubspec.lock that is a locked version. To upgrade the dependencies, use command:

First Flutter App
Now, you can develop Flutter app. We are using command line way. To generate a boilerplate app you can use following commands:

Give any name to the app. Let’s say “flutter_test” for now.

It create the boilerplate of the app inside the flutter_test directory.

This would create a Flutter app which works like a counter of the number of times you have pressed ‘+’.
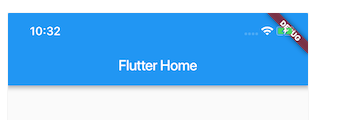
You have successfully run your first Flutter app!
Directory Structure
We see the directory structure as follows:
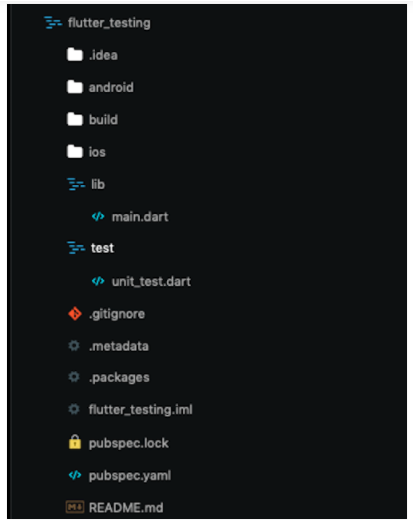
We have built dedicated directories for both the platforms. Some configuration files like pubspec.yaml, .gitignore, etc are also there. There are two main directories where most of our Flutter code will live, i.e. lib and test. In “lib”, we have main.dart where our app code lives and we can write the tests in the “test” directory.
Widgets can be created in the main.dart file. By using this file you can create your app according to your need.
Write Your First Test
Flutter gives a strong testing framework, which permits developers to compose tests at the unit, practical, and UI level. It has quite detailed documentation on how you can test your app built using Flutter.
Now add Widget tests for the demo app, which check the initial state of the app, tap the + button and assert that the state has been and counter incremented. Test will look like this:
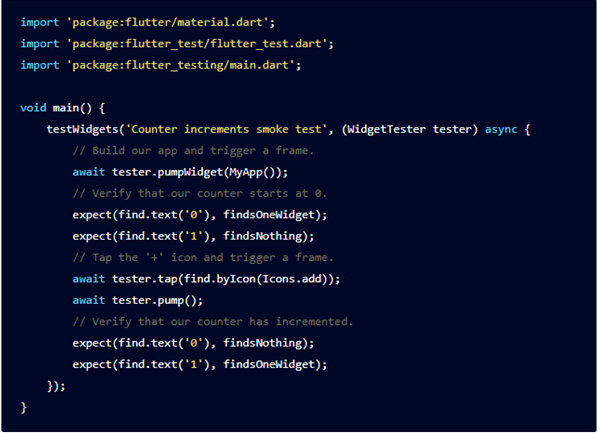
Name the test widget_test.dart and keep it inside the test directory. Using the flutter test command you can run the test which will executes all tests. To execute single test, use command:

The next stage is to run it constantly on the CI worker to get feedback if our functionality keeps on working with the most recent code changes.
Set up Your First Flutter Application on CI
Setting up Continuous Integration for Flutter apps isn’t easy on the blank server. Simply visit the codemagic.io website, register yourself with your GitHub, GitLab or Bitbucket account, and point your app to Codemagic. Codemagic uses the default workflow to take your app through building, testing and publishing steps.
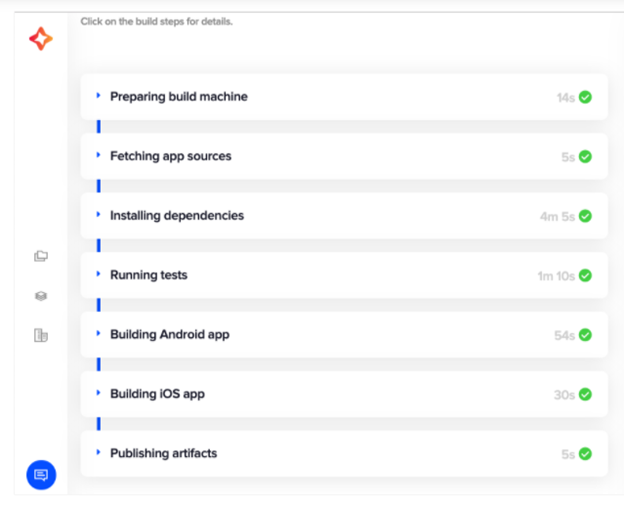
We have now effectively added our application to the Codemagic CI/CD worker. To know more, allude to the Codemagic documentation.
Conclusion
Flutter is an amazing cross-platform mobile application development framework, and developers are anxious to get started with it.
